

A construction punch list is a formal, itemized record of remaining defects and incomplete work used to reach substantial completion and trigger final payment. Get it right and you close out cleanly. Get it wrong and retainage sits in limbo while trade crews make repeat trips.
Three things to know before you read further:
- Purpose: The punch list is a quality-assurance and contractual closeout tool, not a wish list for new scope. Its job is to document deficiencies against the original contract, nothing more.
- Required fields per item: ID, date identified, exact location, description of defect, required corrective action, responsible party, priority, due date, status, verifier, and photo attachment.
- Typical resolution windows: Residential projects generally wrap punch-list items in about 1–2 weeks; commercial projects commonly allow 2–4 weeks, depending on contract terms and project complexity.
The sections below walk through a ready-to-use template, field-tested management steps, and the legal context that makes this document matter.
Table of Contents
- What is a construction punch list and why does it control your payment?
- What kinds of items actually show up on a punch list?
- What fields does every punch-list item need?
- Who resolves items, and what happens when they don’t?
- Best practices that actually shorten punch-list duration
- When should you use a spreadsheet vs. digital punch-list software?
- Key Takeaways
- The part of punch lists most builders get wrong
- How Prestigioushome handles closeout for custom homes in Utah
- Useful sources and where to find templates
What is a construction punch list and why does it control your payment?
A punch list is the formal document created during the final walkthrough that itemizes incomplete work, defects, and nonconformances to be corrected before the project achieves substantial completion. Substantial completion is the contractual milestone at which the owner can use the space for its intended purpose. That milestone, in turn, triggers the Certificate of Substantial Completion and starts the clock on warranties.
The financial stakes are direct. Most construction contracts hold a portion of each progress payment as retainage, typically a percentage withheld until closeout conditions are met. Clearing the punch list is one of those conditions.
Who participates in the walkthrough varies by project type, but the core group is almost always the general contractor, the owner or owner’s representative, and the architect or design professional. Each party has a different lens: the GC is tracking trade completion, the owner is checking livability and finish quality, and the architect is verifying conformance with the construction documents. All three perspectives belong in the room.
One boundary worth stating clearly: the punch list is a deficiency list, not a change-order vehicle. Adding new scope during punch-list resolution requires a separate formal change order. Mixing the two creates billing confusion, warranty gaps, and scheduling headaches that can delay final payment for everyone.
What kinds of items actually show up on a punch list?
Punch-list items fall into four categories: things to test or verify, things to fix or repair, things to add or install, and things to remove or clean. Knowing those buckets before the walkthrough helps you inspect with a system rather than wandering room to room hoping you catch everything.
Here is how those categories break down by trade:
- Paint and drywall: touch-up scuffs and roller marks, repair nail pops, patch cracks at corners and window openings, verify sheen consistency
- Doors, windows, and trim: adjust doors that bind or fail to latch, install missing hardware, caulk gaps at window and door frames, verify weatherstripping seals
- HVAC: test all registers for airflow, verify thermostat programming, confirm exhaust fans vent to exterior, check filter installation
- Plumbing: test all fixtures for leaks and proper drainage, verify water heater temperature setting, confirm shut-off valves operate, check caulk at tub and shower surrounds
- Electrical: test all outlets and switches, verify GFCI protection in wet areas, confirm fixture installation is complete, check panel labeling
- Exterior and site work: verify grading drains away from the foundation, confirm driveway and walkway surfaces are complete, check that landscaping or erosion control meets contract requirements, remove construction debris and temporary protection
The way you write each item matters as much as finding it. A vague entry like “fix door” sends a carpenter back to the site without enough information to do the work in a single trip. A precise entry reads: “Master bedroom entry door, east wall: door binds at top latch strike; adjust strike plate so door latches without force.” Location plus specific fix plus a photo attached. That combination is what gets items closed on the first return visit.
What fields does every punch-list item need?
Every item on your construction completion list needs eleven fields to be legally defensible and operationally useful. The table below defines each one and shows a sample entry so you can see the correct level of detail.

| Field | Definition | Sample Entry |
|---|---|---|
| Item ID | Unique sequential number for tracking | PL-047 |
| Date identified | Date the defect was documented | June 3, 2026 |
| Exact location | Room, wall face, elevation, or grid reference | Master bath, south wall, 18" above floor |
| Description of defect | What is wrong, stated factually | Grout joint cracked along full length of tub surround base |
| Required corrective action | Specific fix the trade must perform | Remove cracked grout, regrout with matching color, seal |
| Responsible party | Trade or subcontractor assigned | Tile subcontractor |
| Priority | High / Medium / Low based on occupancy impact | High |
| Due date | Date by which the fix must be verified complete | June 10, 2026 |
| Status | Open / In Progress / Pending Verification / Closed | Open |
| Verifier | Name of person who will confirm the fix | Project architect |
| Photo attachment | File name or link to photo taken at identification | PL-047_tub-grout-crack.jpg |
A fully written sample entry looks like this: PL-047 | June 3, 2026 | Master bath, south wall, 18" above floor | Grout joint cracked along full length of tub surround base | Remove cracked grout, regrout with matching color, seal | Tile subcontractor | High | June 10, 2026 | Open | Project architect | PL-047_tub-grout-crack.jpg.
Copy those fields into a spreadsheet tab or a digital punch-list app. Either works. The schema is what matters, not the medium.
Pro Tip: Take the identification photo before you write the description. The photo forces you to look closely enough to write a precise description, and it gives the trade a visual reference that eliminates ambiguity about exactly what needs fixing.
Who resolves items, and what happens when they don’t?
The general contractor coordinates punch-list resolution but does not personally fix most items. Subcontractors execute the repairs within their trade scope, and the owner or architect verifies each fix before the item closes. That three-party chain matters because verification requires a photo of the completed repair and a formal sign-off from the verifier, not a verbal confirmation from the sub who did the work.

Resolution windows depend on project type and contract terms. Residential projects typically resolve items in about 1–2 weeks. Commercial projects commonly allow 2–4 weeks, with larger or more complex jobs running toward the longer end. Factors that push timelines out include material lead times for replacement parts, trade availability during busy seasons, and items that require re-inspection by a building official.
When an item stays unresolved past its due date, the escalation path is straightforward:
- Document the missed deadline in writing, referencing the specific item ID and due date
- Pull the relevant contract specification section that the deficiency violates
- Log all communication attempts with timestamps
- Request architect mediation in writing if the GC and sub cannot agree on scope or responsibility
Pro Tip: Frame escalation around the contract, not the relationship. “Item PL-047 remains open past the June 10 due date per our agreement” is a factual statement that preserves leverage without creating personal conflict. Adversarial language slows resolution; contract language speeds it.
Retainage and occupancy both sit downstream of punch-list clearance. Every day an item stays open is a day the owner cannot fully occupy the space and the contractor cannot collect final payment. That shared interest is usually enough motivation to resolve disputes before they reach formal mediation.
Best practices that actually shorten punch-list duration
The single most effective process change is starting early. A rolling punch list maintained during the last 30–60 days of a project is far more efficient than trying to document everything in one final walkthrough. Defects caught during rough-in or framing inspections can be corrected before finish work covers them, which eliminates the most expensive category of punch-list repair.
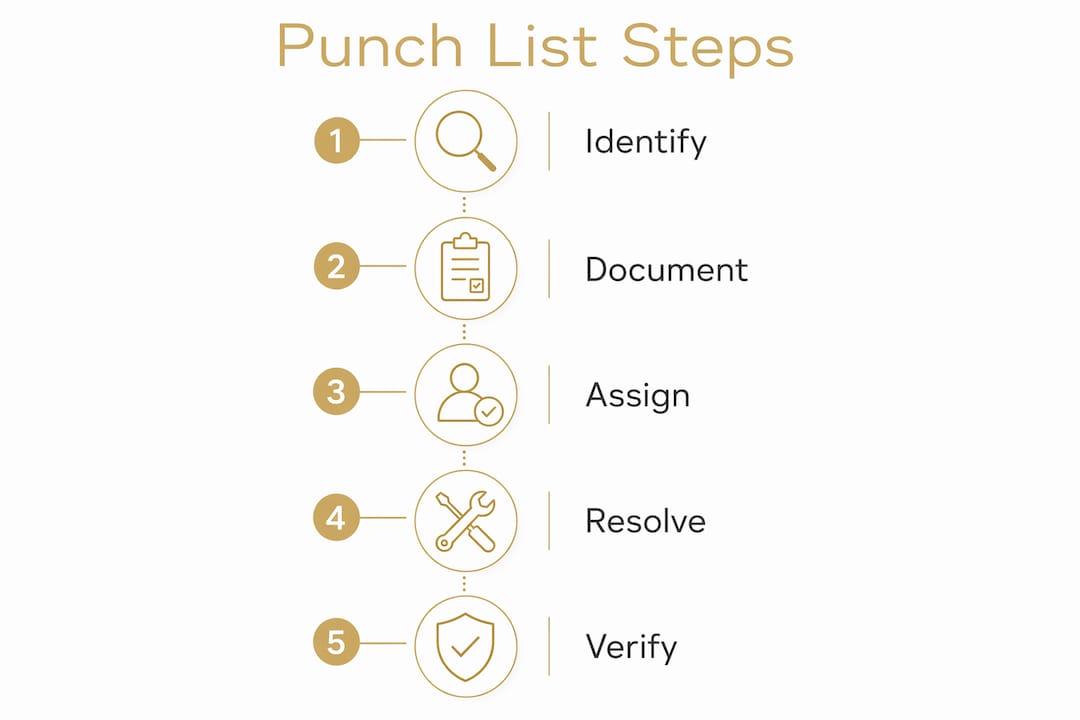
Here is the workflow that field teams use to close lists faster:
- Conduct an internal pre-punch walkthrough two to three days before the official owner walkthrough. The GC and superintendent walk every space, document every open item, and assign trades before the owner sees the list. This prevents surprises and demonstrates professionalism.
- Filter the master list by trade before distributing. Each subcontractor receives only their assigned items. Trade-filtered distribution increases completion rates because subs can schedule a single focused return trip rather than hunting through a 60-item master list for their three items.
- Schedule repair waves in the right order. Mechanical trades go first (HVAC, plumbing, electrical), then carpentry and finish trades, then paint, then final clean. Working in that sequence protects freshly finished surfaces from damage by later trades.
- Set due dates by priority, not by convenience. High-priority items that affect occupancy or safety get the shortest windows. Low-priority cosmetic items can run to the tail of the schedule.
- Require photo verification at close, not just at identification. Never mark an item closed based on a subcontractor’s word. The verifier confirms the fix in person or reviews a timestamped photo before the status changes to Closed.
Pro Tip: Keep the rolling list in a shared location every stakeholder can read in real time. When the owner, GC, and architect all see the same live data, the “I didn’t know that was still open” conversation disappears entirely.
When should you use a spreadsheet vs. digital punch-list software?
For a small residential remodel with fewer than 20 items and a single trade crew, a well-structured spreadsheet is perfectly adequate. The eleven-field schema above fits cleanly into Google Sheets or Excel, and a PDF export serves as the sign-off record.
Move to a dedicated digital tool when the project involves multiple subcontractors, multiple buildings or units, or when the owner and architect are not on-site daily. The features that actually matter in a digital punch-list platform are:
- Mobile photo upload tied directly to the item record, captured on-site without a separate transfer step
- Trade filtering and assignment so each sub sees only their work
- Status workflow with timestamps so every status change is auditable
- PDF sign-off export for the closeout package and warranty documentation
- Real-time access for all parties, eliminating the email-chain version-control problem
The audit trail is where digital tools earn their cost. A formal sign-off workflow with timestamps and verifier identity creates the documentation needed if a punch-list item later becomes a warranty claim or a payment dispute. Paper lists can be lost, altered, or disputed. A timestamped digital record is much harder to argue with.
The shared, transparent record that digital platforms provide also reduces the back-and-forth between homeowner, architect, and contractor that paper-based lists generate. For any project with more than two or three active trades, the time savings alone justify the switch.
Key Takeaways
A construction punch list is a contractual closeout tool: every item must be specific, assigned, photo-documented, and formally verified before retainage releases and substantial completion is declared.
| Point | Details |
|---|---|
| Contractual weight | Punch-list clearance is a common condition for retainage release and the Certificate of Substantial Completion. |
| Required item fields | Each entry needs eleven fields: ID, date, location, description, corrective action, responsible party, priority, due date, status, verifier, and photo. |
| Resolution windows | Residential projects typically close items in 1–2 weeks; commercial projects commonly allow 2–4 weeks. |
| Start early | A rolling list maintained during the last 30–60 days of a project is more efficient than a single final walkthrough. |
| Prestigioushome approach | Prestigioushome manages punch-list closeout as a structured part of every custom home and remodel project, with photo documentation and formal sign-off at each step. |
The part of punch lists most builders get wrong
Most articles on this topic focus on what to put on the list. The harder problem is what to keep off it.
Owners arrive at the final walkthrough with months of accumulated wish-list items, design second-thoughts, and upgrade ideas. Some of those are legitimate deficiencies. Many are not. The punch list is a deficiency record against the contract, and conflating it with a change-order request creates a document that nobody can close cleanly. The GC cannot price new scope as a punch-list correction. The subcontractor cannot warranty work that was never in their original contract. And the owner ends up frustrated when “their items” don’t get resolved on the punch-list timeline.
The fix is a pre-walkthrough conversation, not a longer list. Before the official owner walkthrough, a good builder walks the owner through the distinction: deficiency versus new scope. That ten-minute conversation prevents two weeks of dispute. For custom home projects especially, where owners are deeply invested in every finish detail, setting that boundary early is what keeps the closeout professional and the relationship intact.
The other thing builders underestimate is the value of the internal pre-punch. Walking the project yourself before the owner arrives is not about hiding problems. It is about finding them first so you can assign them, schedule the repairs, and show up to the owner walkthrough with a plan rather than a surprise. That shift from reactive to proactive is what separates a two-week closeout from a six-week one.
How Prestigioushome handles closeout for custom homes in Utah
Punch-list closeout is where a project’s quality either holds up or falls apart, and Prestigioushome builds the closeout process into every project from the start. For homeowners in Washington and Iron Counties, Utah, that means a structured internal walkthrough before the final client review, photo documentation on every identified item, trade-filtered assignment so each crew returns once with a clear scope, and formal sign-off before any item is marked closed.
If you are planning a custom home build, remodel, or addition and want to understand exactly how closeout and final payment will work before you sign a contract, Prestigioushome offers consultations that walk through the full process. Contact Prestigioushome to schedule a conversation about your project.
Useful sources and where to find templates
The sources below are worth bookmarking depending on what you need most.
- Procore’s punch list guide: Best for contractual context, field definitions, and understanding how digital tools connect to the closeout workflow. Procore’s treatment of retainage and verification protocol is the most thorough freely available resource.
- Wikipedia: Punch list: Useful for a quick definitional reference and the historical context of the term. Not a template source, but a reliable starting point for explaining the concept to a client or owner unfamiliar with construction terminology.
- PlanUpPro’s closeout guide: Practical focus on timelines and rolling-list methodology. Good for project managers who want process guidance rather than contract theory.
- Washington State L&I Construction Safety Checklist: A field-ready safety inspection checklist from Washington State’s Department of Labor and Industries. Not a punch-list template, but a useful parallel document for confirming safety-related items are resolved before occupancy.
- Prestigioushome: For homeowners in Washington and Iron Counties, Utah, the Prestigioushome website is the local resource for custom home closeout support, including punch-list management as part of a full-service build or remodel contract.
For contract and legal context, the AIA General Conditions (AIA Document A201) is the authoritative reference for how substantial completion, retainage, and punch-list obligations interact in a standard construction contract. Your project attorney or architect can provide the current edition.

