

Legacy planning examples, not schedule or price commitments: All durations, lead times, budget ranges and contingency percentages below are unverified legacy illustrations, not Prestigious Home Builders pricing, quotes, current Utah averages or guaranteed schedules. Actual timing and cost depend on scope, existing conditions, selections, supplier availability and required approvals. Confirm permit and inspection requirements under the jurisdiction’s adopted code with the local building authority, and follow manufacturer installation, testing and curing instructions.
A bathroom remodel timeline varies from the initial consultation through the final walkthrough, depending on scope and complexity. The original article’s unverified legacy examples put a cosmetic refresh (new fixtures, paint, vanity swap) at 1–2 weeks of on-site work and a full gut remodel with layout changes at 6–12 weeks of construction alone. These are illustrative, project-dependent ranges, not current estimates or commitments. Pre-construction—design, selections, permits and ordering—adds time before demolition begins.
The construction window varies with scope, and preparation before demo can affect the schedule. The original article cited permit approval from one week to several months and custom vanity, specialty tile and frameless glass lead times of 2–8 weeks. These are unverified legacy examples, not current local or supplier estimates. Confirm approval timing with the local building authority and lead times with each supplier before demolition.
The following pre-construction and on-site durations are unverified legacy illustrations, not promised schedules; actual timing depends on scope, approvals and supplier availability.
- Cosmetic refresh: 1–2 weeks on-site, 1–2 weeks pre-construction
- Mid-range remodel (tile, vanity, fixtures): 3–4 weeks on-site, 2–4 weeks pre-construction
- Full gut with layout changes: 6–12 weeks on-site, 4–6 weeks pre-construction
Pro Tip: Two important schedule risks are material lead times and inspection gates. Lock your tile, vanity, countertop, and glass selections before demo day, and call your local building department to ask about current permit turnaround times before you set a start date.
What changes a bathroom remodel timeline: the primary drivers
Six factors can move your project toward the fast or slow end of the range. Understanding them before signing a contract can help you plan for potential disruptions.
Scope and layout changes are important variables. Moving a toilet, relocating a shower drain or adding a window may involve plumbing or structural work and can extend the schedule. Like-for-like fixture replacements generally involve fewer construction steps.
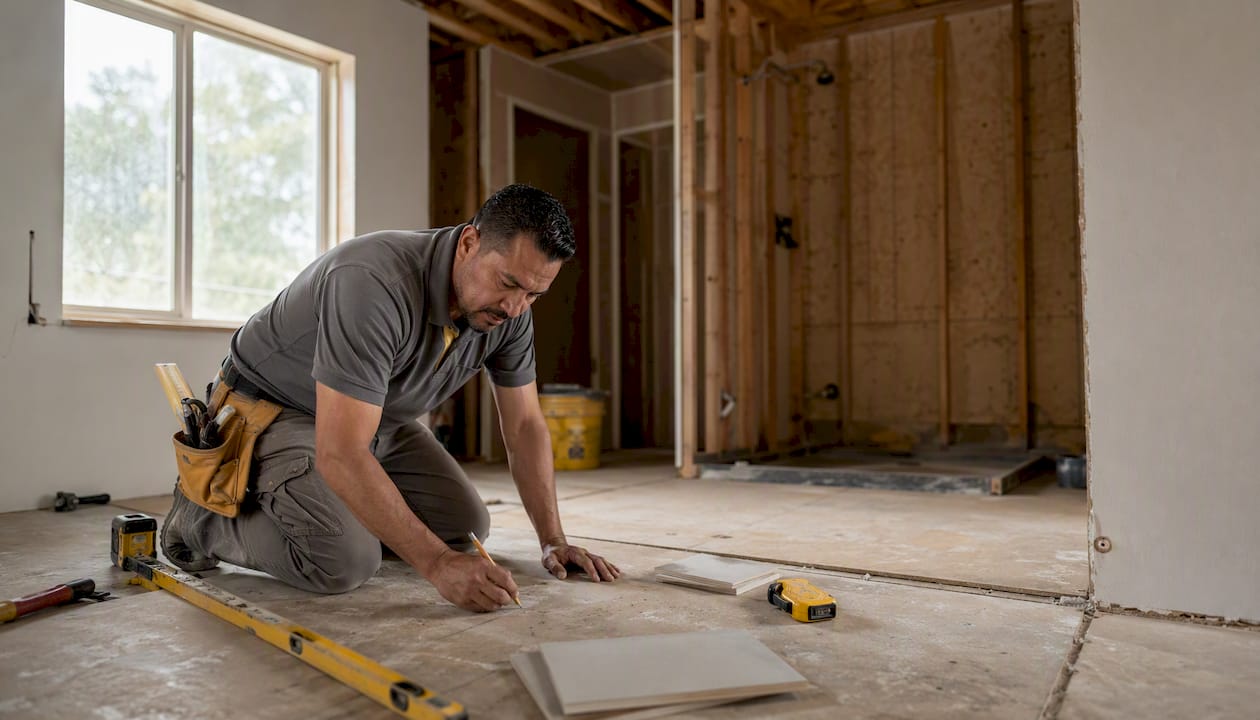
Permit and inspection timing can affect the schedule. The original article’s one-week-to-several-month permit range and days-to-weeks re-inspection wait are unverified legacy illustrations, not current local estimates. Confirm required approvals, inspection stages and scheduling with the local building authority under its adopted code. Where rough-in inspections are required, obtain approval before concealing work.
Material lead times can create idle periods when custom or semi-custom items arrive late. The table below retains unverified legacy illustrative lead times, not current supplier availability or delivery commitments; confirm order, templating and fabrication dates with each supplier.
| Material | Typical Lead Time |
|---|---|
| Stock vanity (big-box) | 1–5 days |
| Semi-custom vanity | 3–6 weeks |
| Custom frameless shower glass | 2–4 weeks after templating |
| Specialty or imported tile | 2–6 weeks |
| Countertop fabrication | 1–3 weeks after templating |
Hidden repairs discovered at demo can be hard to predict. Subfloor rot, galvanized plumbing, outdated wiring and mold may become apparent after demolition. The original suggestion of several contingency days and a 10–15% contingency fund is an unverified legacy planning example, not a sufficient allowance for every project; set reserves based on the property and scope.
Subcontractor scheduling matters because plumbers, electricians and tile setters have separate calendars. Gaps between trades can compound, particularly when local workloads are high.
Homeowner decision speed can influence the schedule, though not every change is avoidable. Late selections and change orders can extend work. Confirm selections before demo where practical, and agree on a process for necessary changes.
Quick mitigation for each driver:
- Layout changes: Finalize the floor plan before design is complete; price out plumbing moves before committing.
- Permits: Confirm application prerequisites and required permits with your local building authority; apply when the required plans and documentation are ready.
- Materials: Confirm supplier lead times during design and order long-lead items early enough for the agreed construction sequence.
- Hidden repairs: Set a contingency budget and document the approval, pricing and change-order process for discoveries in the contract.
- Trade coordination: Ask your contractor for a written schedule showing each trade’s start and end dates before work begins.
- Decision speed: Make all selections, including grout color and hardware finish, before demo day.
What do sample timelines look like for different project scopes?
These three project types illustrate different scopes. All durations in the following table are unverified legacy planning examples, not current estimates or project commitments; actual timelines depend on conditions, approvals, selections and availability.
| Project Type | Scope Summary | Pre-Construction | On-Site Construction | Total Range |
|---|---|---|---|---|
| Cosmetic refresh | Paint, fixtures, vanity swap, no tile or plumbing moves | 1–2 weeks | 1–2 weeks | 2–4 weeks |
| Mid-range remodel | New tile, vanity, fixtures, shower surround, same layout | 2–4 weeks | 3–4 weeks | 5–8 weeks |
| Full gut with layout changes | Complete demo, new layout, custom tile, glass, all new plumbing/electrical | 4–6 weeks | 6–12 weeks | 10–18 weeks |
Structural work, such as removing a load-bearing wall or raising a ceiling, can extend these ranges. The original article’s minimum addition of one to two weeks is an unverified legacy example, not a reliable minimum. Separate trade permits and inspections may affect sequencing, and imported or custom materials may extend pre-construction.
For homeowners with a single bathroom, confirm how long usable bathroom access will be unavailable. The original three-to-four-week mid-range example is an unverified legacy illustration, not a guaranteed outage window. Plan alternative arrangements before demo, allowing for possible delays.
When a home has multiple bathrooms, contractors sometimes stagger work to keep one functional. That approach can extend the overall project calendar slightly but preserves daily life considerably.
Phase-by-phase construction timeline: what happens and how long each step takes
The construction sequence has dependencies, but phases may overlap or change order for a particular project. The durations below are unverified legacy illustrations, not a fixed schedule or commitments. Follow manufacturer installation and curing instructions, and confirm required inspections under the jurisdiction’s adopted code with the local building authority. Vanity installation must precede countertop templating even though it is listed afterward here.
Protection and staging (half a day): Floors, doorways, and adjacent rooms are protected. Materials already on-site are staged. Protection helps limit dust and debris reaching adjacent spaces.
Demolition and discovery (1–3 days): Tile, fixtures, drywall, and flooring come out. This is when hidden problems appear. Subfloor rot, mold, old galvanized pipes, and outdated wiring all surface here. Budget time and money for at least minor discoveries.
Structural repairs (1–5 days, if needed): Subfloor replacement, framing corrections, or window modifications happen before any rough-in work. Duration depends entirely on what demo revealed.
Rough-in plumbing and electrical (4–7 days): New drain and supply lines are run; electrical circuits are added or relocated. This phase must be complete before the rough-in inspection.
Rough-in inspection (scheduling varies): Confirm required inspections with the local building authority and obtain any required rough-in approval before closing walls. The original same-week to one-to-two-week scheduling examples are unverified legacy illustrations; local availability and correction work can change the wait.
Substrate and waterproofing (2–4 days): Cement board or tile-ready panels go up; waterproofing membrane is applied to the shower and wet areas. Follow the waterproofing system manufacturer’s substrate, installation, curing and testing instructions, and any inspection requirements under the locally adopted code. Premature covering can compromise the assembly.
Tile installation (5–10 days): Tile work is often the longest single on-site phase, and complexity matters. Large-format tiles, intricate patterns, and niche details all add time. Follow the grout, sealant and any applicable sealer manufacturer’s curing and service-readiness instructions before using the shower.
Countertop templating (1 day on-site, then 1–3 weeks fabrication): The countertop fabricator templates after the vanity is set and tile is complete. The one-to-three-week fabrication range is an unverified legacy example; confirm timing and templating prerequisites with the fabricator. Vanity placement generally precedes final templating.
Vanity and cabinetry installation (1–2 days): Vanity cabinet goes in before countertop templating. Confirm the vanity has arrived and been inspected for damage before this day arrives.
Glass measurement and fabrication (1 day on-site, then 2–4 weeks fabrication): Custom frameless shower glass cannot be templated until tile is complete and cured. The fabricator measures, then glass is cut and finished off-site. The two-to-four-week addition is an unverified legacy example, not a current fabrication commitment; confirm timing and measurement prerequisites with the glass fabricator.
Final fixtures (1–2 days): Toilet, faucets, shower valve trim, towel bars, mirrors, and lighting are installed after tile, countertop, and glass are in place.
Paint and trim (1–2 days): Final paint, baseboard, and door casing go in after fixtures to avoid damage.
Punch list and final inspection (1–3 days): Walk the space with your contractor, note any items needing correction, and schedule the final building inspection if required. Correction work and any required final inspection may extend beyond the illustrative duration.
Pro Tip: Contact shower-glass and countertop fabricators before demo. Share design drawings and ask about current backlogs, measurement prerequisites and estimated fabrication times. Final glass measurements generally follow completed tile work, so early coordination helps planning but does not guarantee an end date.
What causes the most delays, and how do you prevent them?
Common causes of schedule slippage can be anticipated, though not every delay can be prevented. Planning before demo can reduce avoidable gaps.
Late material orders can leave a bathroom idle. Confirming selections during design and ordering in time for installation can reduce that risk. The original three-to-six-week delay for a late custom vanity is an unverified legacy illustration; ask the supplier for current timing.

Failed or delayed inspections can stall a project. Ask the local building authority how far ahead to request required inspections and how corrections and re-inspections are scheduled. Obtain required approvals before concealing work.
Hidden demo discoveries are common enough to budget for. Subfloor rot, mold, galvanized pipes, and knob-and-tube wiring all require remediation before the project can continue. The EPA’s mold cleanup guidance is a useful reference if mold is found during demo. Agree in writing on how discoveries will be assessed, priced, documented and approved, including any limited authorization consistent with the contract.
Homeowner indecision and change orders can affect timing and cost. Changing tile after ordering, swapping a vanity after rough-in or adding heated flooring may require rework or additional approvals. Confirm selections before demo where practical, while allowing a documented process for necessary changes.
Trade coordination conflicts happen when subcontractors are not sequenced tightly. Ask your contractor for a written schedule before work begins. Confirm that each trade knows their start date and that materials will be on-site before they arrive.
Seasonal peak workloads can affect contractor and inspector availability. Ask local contractors and the building department about current capacity rather than assuming fall or winter will be faster.
Pre-construction checklist to lock in schedule-critical items before demo:
- Finalize all design decisions, including tile, grout color, vanity, fixtures, and hardware
- Confirm current supplier lead times for schedule-critical items
- Place orders for all long-lead materials
- Apply for permits and confirm expected approval timeline with the building department
- Schedule rough-in inspection in advance if your jurisdiction allows it
- Arrange temporary bathroom access for single-bath households
- Document contingency repair authorization, pricing and change-order procedures
- The original 10–20% time buffer is an unverified legacy example; agree on a project-specific allowance for possible delays.
A late custom item can delay completion. The original two-to-three-week example is an unverified legacy illustration. Glass measurements generally depend on completed, adequately cured tile; countertop measurements generally depend on a set vanity. Confirm these prerequisites, fabrication backlogs and possible alternatives before demo rather than assuming the waits can be shortened.
How does your budget affect how long the remodel takes?
Budget and timeline are connected, but more money does not automatically mean a faster project. The following budget-to-scope examples and durations are unverified legacy illustrations, not Prestigious Home Builders pricing, quotes, current Utah averages or assurances that a budget covers a particular scope.
Around $5,000 (unverified legacy example): The original article paired this amount with a cosmetic refresh: vanity, toilet, faucets, mirror, paint and lighting, with no tile work or plumbing moves. Its one-to-two-week on-site example assumes suitable stock items are available. Actual scope, pricing and preparation time require project-specific review; see the bathroom remodel cost guide for further planning context.
Around $10,000 (unverified legacy example): The original article paired this amount with a modest mid-range remodel: tile, vanity, stone countertop, fixtures and possibly a tub or shower unit. Its two-to-four-week construction, two-to-four-week pre-construction and four-to-eight-week total ranges are illustrative, not current estimates or confirmation that this budget will cover that scope.
$25,000 and up (unverified legacy example): The original article paired this amount with a full gut remodel, custom tile, frameless glass and possible layout changes. Its six-to-twelve-week construction, four-to-six-week pre-construction and ten-to-eighteen-week total ranges are illustrative, not quotes or commitments. Custom and imported material lead times can affect both budget and schedule.
A few nuances worth knowing:
- Stock materials may be available sooner than custom items, but verify inventory. Ask fabricators whether expedited work is available and at what cost.
- Custom and high-end selections may have longer lead times than available stock alternatives and can extend pre-construction.
- Some suppliers offer expedited shipping for specialty tile or fixtures. The original “hundreds of dollars” surcharge is an unverified legacy illustration; obtain a current supplier quote.
- Regional pricing differs. The original $10,000 comparison is an unverified legacy illustration, not a verified Utah average or a statement of what that budget buys locally.
Whether $5,000 or $10,000 is enough depends on conditions, selections and the agreed scope. Those amounts are unverified legacy examples, not thresholds that guarantee a cosmetic refresh or a tiled remodel. Obtain a project-specific estimate before committing to work.
Pre-project checklist and staging tips to keep the schedule moving
Preparing before demo can help reduce disruption. The original two-to-four-week preparation window is an unverified legacy illustration; start earlier where selections, approvals or lead times require it.
Homeowner prep tasks:
- Finalize every design decision and get them in writing with your contractor
- Confirm that all ordered materials have shipping confirmations and expected delivery dates
- Confirm with the local building authority which permits must be approved and posted before demolition begins
- Clear the bathroom of all personal items, medications, and valuables
- Remove artwork and fragile items from adjacent rooms and hallways
- Clear a path from the exterior entry to the bathroom for material delivery and debris removal
- Arrange temporary bathroom access: a second bathroom in the home, a gym membership, or a portable toilet for longer projects
Staging and logistics:
- Designate a staging area (garage, spare room) for delivered materials before installation
- Schedule deliveries to match the installation sequence: tile before tile day, vanity before vanity day, glass after tile is complete
- Protect hardwood floors and carpet in adjacent rooms with rosin paper or plastic sheeting
- Confirm with your contractor who is responsible for debris removal and when it happens
Contractor responsibilities vs. homeowner tasks:
Agree in writing who handles permit applications and posting, trade scheduling, inspection coordination and debris removal. Homeowners generally manage access, selections and timely approvals. Confirm responsibilities rather than assuming every contract assigns them the same way.
For single-bath households, the on-site construction window is the hardest part of the project. Plan the alternative bathroom arrangement before demo day, not the morning after. A mid-range project runs three to four weeks; a full gut can run six to twelve weeks. That is a long time to rely on a neighbor’s shower.
Planning and sequencing a bathroom remodel
A coordinated plan starts before demo day. Confirm the layout, selections and scope before ordering or scheduling work.
Ask suppliers and fabricators for current lead times and measurement prerequisites, and align deliveries with installation needs. Early orders can reduce idle time but cannot eliminate supply disruptions.
Agree who submits permit applications and tracks approvals. Confirm permit prerequisites and inspection gates with the local building authority under its adopted code.
Ask for a written trade sequence showing dependencies, anticipated dates and how changes will be communicated. Coordination can reduce gaps but cannot guarantee a completion date.
For a bathroom that is part of a larger renovation, discuss shared access and sequencing through full-home remodeling planning.
Key Takeaways
The original ten-to-eighteen-week full-remodel total is an unverified legacy example, not a current estimate. The table retains illustrative legacy durations and contingency percentages; confirm project-specific allowances, supply timing and local approvals before setting a schedule.
| Point | Details |
|---|---|
| Separate pre-construction from on-site work | The legacy 4–6-week pre-construction example is illustrative; include actual design, ordering and approval time in the total. |
| Order long-lead items during design | Vanities, specialty tile, and glass often require several weeks for fabrication and delivery, and late ordering of these items is a common cause of delays. |
| Treat inspections as schedule gates | Confirm required rough-in approval before closing walls and ask the local building authority about inspection booking procedures. |
| Add a contingency buffer | Budget 10–20% extra time and 10–15% extra cost for hidden discoveries and minor delays. |
| Define coordination responsibilities | Agree who handles design decisions, ordering, permitting and trade scheduling in the project contract. |
What contractors wish homeowners knew about remodel timelines
A common misconception is that construction is the whole timeline. Design, selections, ordering and permitting also take time. Confirm schedule-critical materials and required approvals before demo to reduce avoidable gaps.
Late selections can create delays. A clear design direction and early decisions on grout, hardware and mirror sizes can help reduce reorders and rework, while necessary changes still need a documented approval process.
The other thing contractors rarely say directly: living through a remodel is harder than most homeowners expect. Dust travels further than you think. Noise starts earlier than you want. The original three-to-four-week bathroom outage example is an unverified legacy illustration, not a fixed duration; any extended loss of bathroom access needs planning. The homeowners who handle it best are the ones who planned for it before demo day, not the ones who assumed it would be fine.
Change orders are not inherently bad: discoveries or necessary scope adjustments happen. Agree in advance on how changes are documented, priced and approved, including any limited spending authorization consistent with the contract, rather than assuming work may proceed without formal approval.
Compare purchase price with schedule impact when choosing long-lead materials. The original overseas-tile example—six weeks rather than two, saving a few hundred dollars but adding a month—is an unverified legacy illustration, not a current supplier comparison. Confirm actual lead times and total costs before deciding.
Discuss your bathroom remodel scope and schedule
Late orders, permit delays, inspection availability and trade conflicts can affect a bathroom remodel. Discuss these risks, responsibilities and schedule assumptions before committing to construction.
Ask how selections, supplier updates, permit approvals and changes will be reflected in the project schedule. A coordinated plan can reduce avoidable gaps but does not eliminate backorders, inspection delays or unforeseen conditions.
Request a quote to discuss your bathroom project’s scope and scheduling considerations, or explore bathroom remodeling.
Useful sources and where to check permits
For permit requirements and inspection scheduling:
Start with your local municipal building department. Most Utah cities and counties have online portals where you can check permit requirements, submit applications, and schedule inspections. Washington County and Iron County both have building department resources accessible through their official government websites. Call the building department directly to ask about current permit turnaround times before setting a project start date.
For permit triggers and inspection timing, contact the local building authority with your proposed bathroom scope and ask which provisions of its adopted code apply.
For further planning:
- Living through renovation — planning for household disruption.