
General guidance, not engineering or product certification: Moisture, testing, installation and cost statements below are retained from the original article as general planning information. Requirements depend on the actual product, manufacturer instructions, slab and substrate, installer and project conditions. Dollar figures are unverified legacy examples, not a Prestigious Home Builders quote.
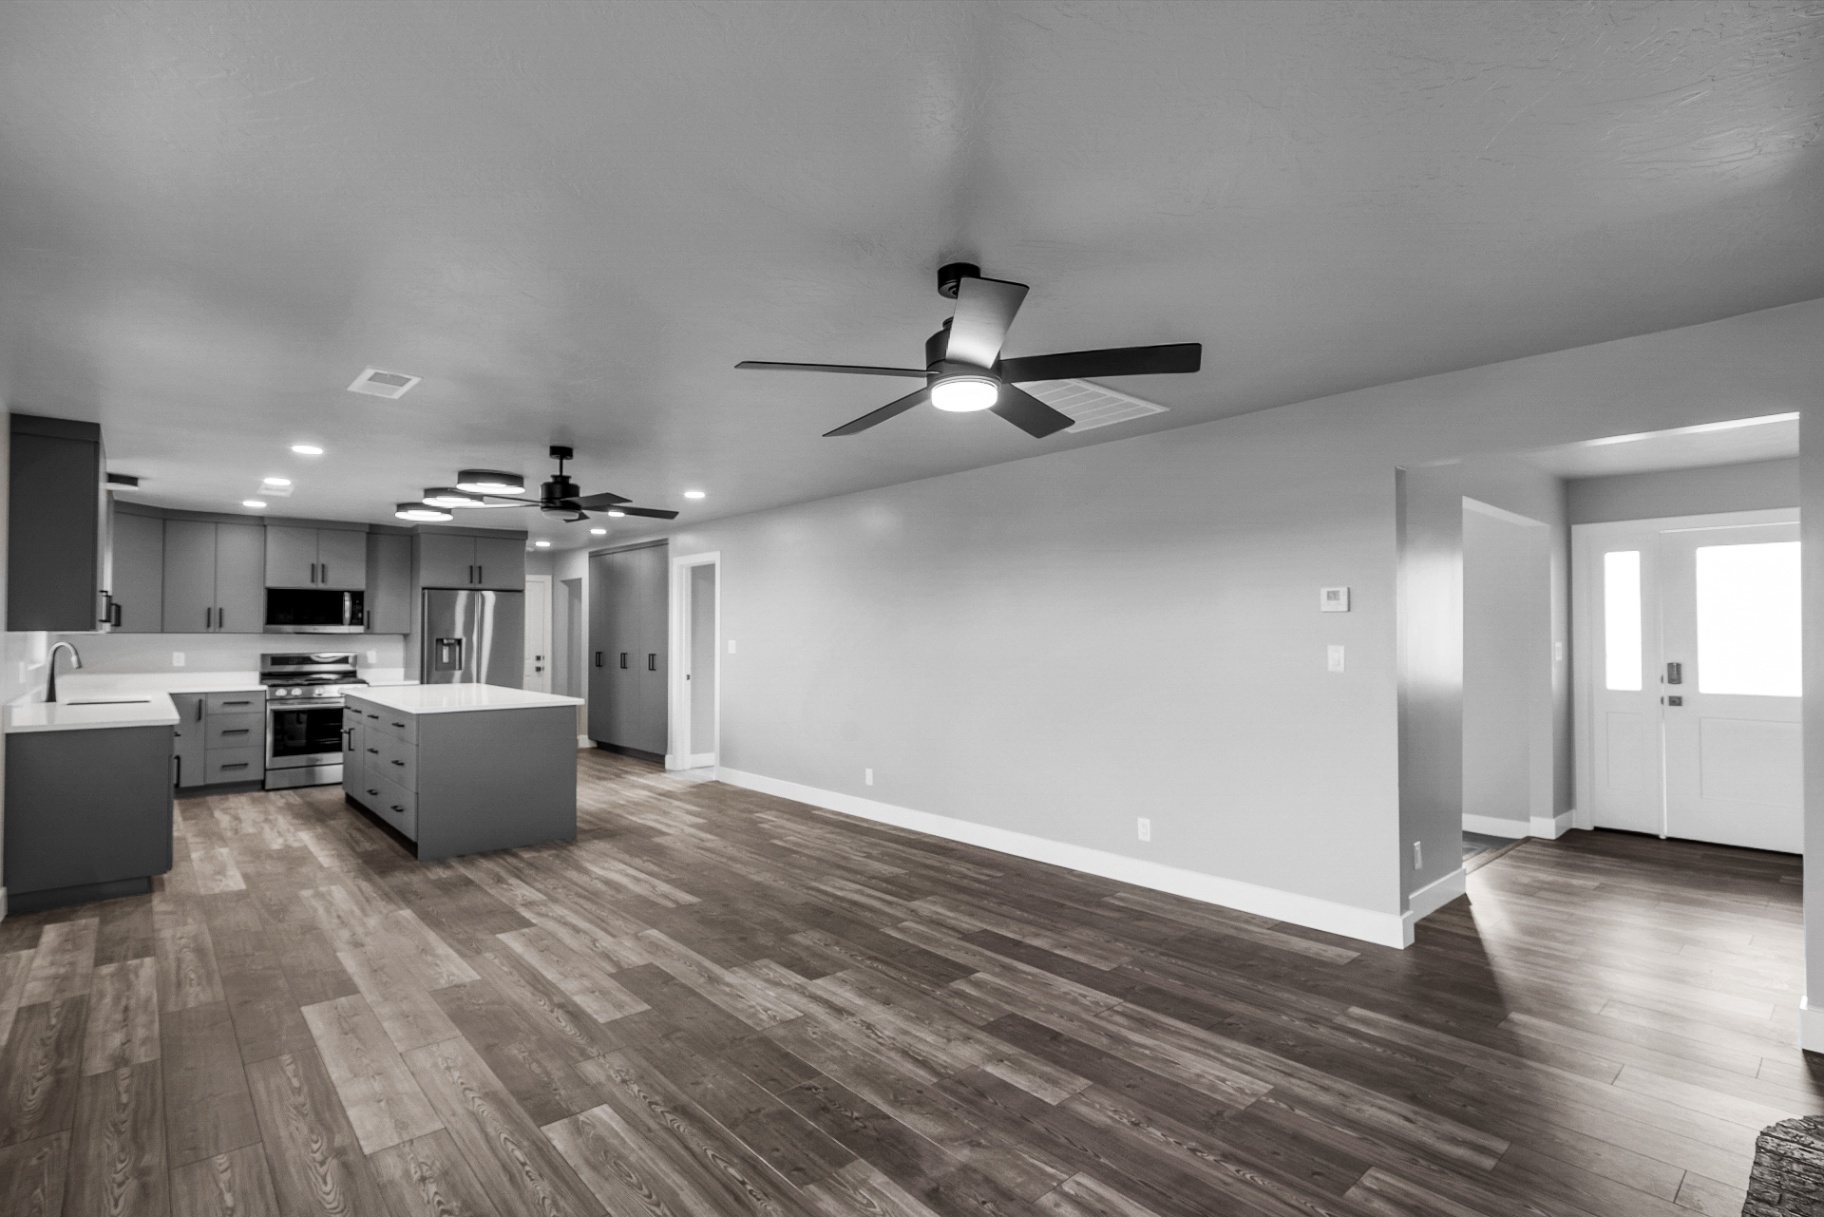
Rigid-core luxury vinyl plank labeled waterproof by its manufacturer is often recommended as an all-around option for many finished basements, balancing moisture resistance, warmth, and cost. Porcelain tile or epoxy coatings win out in laundry rooms, walkouts, and utility areas where moisture risk runs highest, and carpet tiles add comfort in low-risk bedrooms or lounge zones. Before any of that, test and prep the slab.
TL;DR:
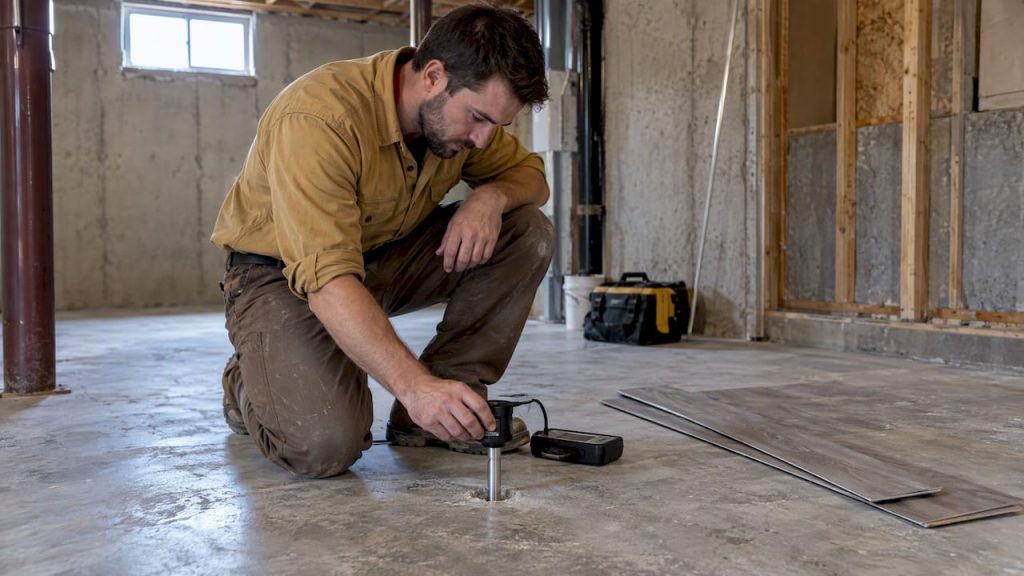
- Test concrete before buying flooring: ASTM F2170 describes in situ probe testing of slab relative humidity, while a 24 hour plastic sheet check offers only a rough preliminary read. Follow the flooring manufacturer’s specified method.
- Assign materials by exposure: use porcelain tile or epoxy in laundry and utility zones, while carpet tiles suit low risk bedrooms and media rooms.
- Legacy example: for a 600 square foot basement, the original article estimated LVP at about $2,400 to $6,000 and porcelain tile at $4,200 to $10,800 before preparation (unverified; not a quote).
- Avoid solid hardwood and fiberboard core laminate below grade; vapor moving through concrete can cause swelling and cupping even without visible flooding.
- Dry wet flooring promptly: EPA moisture guidance recommends drying wet materials quickly, commonly cited as within 24 to 48 hours,, and saturated carpet tiles should be lifted to inspect the slab.
1. Waterproof luxury vinyl plank: why it’s the basement workhorse
Rigid-core luxury vinyl plank, often called LVP or SPC (stone polymer composite), uses a mineral-based core that is generally less prone to swelling when wet than wood-based cores. Performance depends on the specific product and installation, which is why it is commonly considered for below-grade installation, where industry guidance recommends it as the best all-around choice for finished basements.
Underlayment matters as much as the plank itself. A high-density foam pad attached to the plank’s back resists compression over time, which keeps the click-lock seams from working loose under furniture legs or foot traffic. Loose, low-density pads can compress unevenly and contribute to seam separation over time.
The original article estimated an installed cost of roughly $4 to $10 per square foot (unverified legacy example), with the lower end covering basic click-lock installs over a clean slab and the higher end reflecting pattern layouts, stair nosing, or an added subfloor membrane.
- Confirm the product is labeled “waterproof,” not just “water-resistant,” since the two ratings are not the same.
- Choose a rigid core (SPC) over flexible WPC in basements that see any standing water risk.
- Follow the manufacturer’s acclimation instructions; some products call for a period such as 48 hours, while others differ.
Common failure points include installing over an untested slab, skipping expansion gaps at walls, and using a thin foam pad that bottoms out under heavy furniture.
Pro Tip: Ask your installer for planks with an attached high-density pad rather than a separate rolled underlayment, since it reduces the number of failure points at the seams.
2. Porcelain and ceramic tile: the flood-proof choice
Porcelain and ceramic tile are highly moisture tolerant because the material itself does not absorb water the way wood-based products do, though grout, setting materials and the slab still matter. That makes tile a strong option anywhere spills or minor flooding are a real possibility, including laundry rooms, bathrooms, and walkout entries.
Installation is more involved than LVP. A basement tile job often calls for cement backerboard or an uncoupling membrane over the slab, then thinset mortar and grout. Skipping the decoupling layer risks cracked grout lines if the slab shifts slightly, which concrete slabs do over seasons.
Installed costs typically range from moderate to higher cost levels per square foot, influenced by tile size, pattern complexity, and the addition of a heated subfloor. Tile reads cold underfoot in a basement that already runs a few degrees cooler than the rest of the house, so homeowners who want tile in a living space often pair it with electric radiant heat mats under the thinset.
- Pick porcelain over ceramic for basement floors since it is denser and less porous.
- Add a crack-isolation or uncoupling membrane before tiling over any concrete slab.
- Budget for radiant heat if the tile will sit in a room where people walk barefoot.
Compared with LVP, tile wins on long-term resilience in wet zones but loses on comfort and upfront cost, which is why many homeowners mix the two by room rather than choosing one for the whole basement.
3. Epoxy and polyaspartic coatings on concrete: seamless utility floors
For garages, home gyms, and workshops, an epoxy or polyaspartic coating turns the existing slab into a seamless, easy-to-clean surface without adding a separate flooring layer. These coatings bond directly to prepared concrete and are generally chosen for abrasion resistance from equipment, tools and traffic; performance depends on the product and preparation.
- Seamless finish means no grout lines or seams for dirt and moisture to collect in.
- Cleaning is typically a damp mop or shop vacuum, with no special products needed.
- High abrasion resistance holds up under rolling carts, weight equipment, or parked vehicles.
Coatings are unforgiving about prep. The slab needs to be clean, free of oil and old sealers, and within the moisture range the coating manufacturer specifies, since trapped vapor underneath can cause bubbling or delamination months after installation.
The original article placed cost from a few to around a dozen dollars per square foot (unverified legacy example), with more decorative coatings at the higher end and plain epoxy on a well-prepped slab at the low end.
Coatings make the most sense in utility spaces rather than finished living areas, since they stay cold and hard underfoot and offer none of the warmth or sound-dampening that carpet or LVP provide.
Pro Tip: Schedule epoxy work for a stretch of low humidity days, since most coatings need a narrow temperature and humidity window to cure properly.
4. Engineered wood and laminate: when they work and why to be cautious
Solid hardwood and laminates with a fiberboard core are generally a poor fit below grade. Both absorb moisture from the slab through ongoing vapor movement, and building science research warns that this vapor drive causes cupping, swelling, and eventual failure even when no visible flooding ever occurs.
Engineered wood, which layers a hardwood veneer over a plywood core, tolerates basement humidity better but still needs a vapor-control system underneath, typically a sheet vapor barrier plus a subfloor designed to let moisture escape rather than trap it against the wood.
- Choose engineered wood only after confirming slab moisture levels with proper testing.
- Install a vapor barrier and a compatible subfloor system rather than nailing or gluing directly to concrete.
- Be cautious with fiberboard-core laminate below grade and review the manufacturer’s below-grade instructions and warranty terms.
Installed cost for engineered wood in a basement generally ranges from a moderate to somewhat higher cost per square foot once the vapor-control subfloor is included. Homeowners who want the look of wood without the moisture sensitivity usually land on wood-look rigid-core LVP instead, which costs less and carries far less risk.
Because the subfloor and vapor-control work is specialized, this is one category where hiring a flooring professional for the prep stage, even if a homeowner installs the surface layer, can help reduce the risk of problems later.
5. Carpet tiles and modular carpet: warmth with a replaceable approach
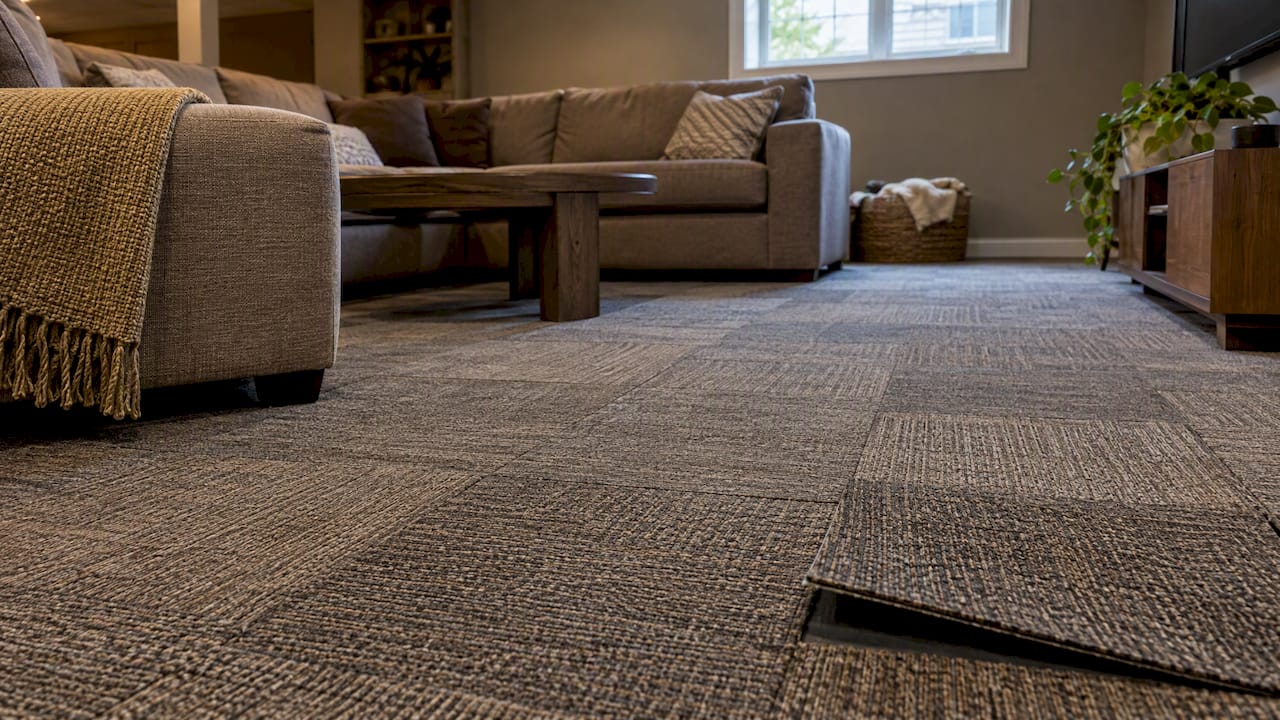
Carpet tiles solve the basement comfort problem without the all-or-nothing risk of broadloom carpet and pad. Because each tile is an individual square, a single water-damaged section can be lifted and replaced without tearing out the whole floor, which matters in a space where a slow leak might go unnoticed for weeks.
Look for synthetic fibers, typically nylon or polypropylene, paired with a waterproof backing rather than a traditional jute or felt backing that holds moisture against the slab.
- Choose modular carpet tiles over broadloom carpet with a separate pad in any basement.
- Confirm the tile backing is rated waterproof, not just stain-resistant.
- Keep a few spare tiles from the original batch for easy spot replacement.
Cost runs in a relatively affordable range per square foot installed, making carpet tiles a budget-friendly comfort upgrade for bedrooms or media rooms. If a tile does get wet, pull it up promptly, dry the slab underneath, and only reinstall once it is fully dry to avoid trapping moisture.
6. Painted, polished, and stained concrete plus raised interlocking tiles
Painted or stained concrete is the lowest-cost route to a finished-looking basement floor, since it works with the slab that is already there rather than adding a new material layer. A quality concrete floor paint or stain plus sealer was estimated in the original article at $2 to $6 per square foot (unverified legacy example); moisture performance depends on the coating, slab condition and manufacturer limits.
- Polished concrete adds a higher-end look but costs more due to the grinding and sealing process.
- Interlocking PVC, rubber, or foam tiles snap together over the slab and lift back up easily, useful for gyms or playrooms.
- Raised interlocking tiles create a small air gap that helps manage minor dampness without full vapor-barrier work.
These options trade permanence and comfort for low cost and flexibility. Painted concrete looks utilitarian compared with tile or LVP, and foam tiles are better suited to a workout zone than a room meant to feel like a finished living space.
7. How to choose by room and use: living areas, bedrooms, laundry, gym, storage
Zoning the basement by function, rather than picking one material for the whole floor, is how most remodelers approach a finished basement. Living rooms and media areas do well with rigid-core LVP for its balance of warmth and water resistance. Bedrooms suit carpet tiles for comfort. Laundry rooms and walkout entries call for porcelain tile or epoxy given their direct exposure to spills and foot traffic. Home gyms benefit from epoxy or rubber interlocking tiles that handle equipment weight. Storage and mechanical rooms are well served by painted concrete, since appearance matters less than moisture tolerance there.
- Test the slab for moisture before buying any material.
- Match each room’s flooring to its moisture exposure first, comfort second, cost third.
- Decide whether a dimpled subfloor membrane is worth the added warmth in living spaces.
- Set a per-room budget rather than one number for the whole basement.
- Get at least two installation quotes before committing to a material.
8. Slab preparation and moisture testing: the non-negotiable checklist
Every basement flooring decision depends on what the slab is doing underneath, and that is not something you can judge by eye. ASTM F2170 is the standard test method for determining relative humidity inside a concrete slab using in-situ probes, and many flooring manufacturers specify this test or another method in their installation and warranty terms. Check the specific product’s requirements.
A plastic-sheet test, taping a clear plastic square to the slab for 24 hours and checking for condensation, gives a rough preliminary read but misses what is happening deeper in the concrete. A professional RH probe test drills into the slab and reads moisture at the depth that matters for flooring performance, which is generally more informative than a surface check; readiness is defined by the flooring manufacturer’s limits.
Building and foundation moisture-control guidance points to drainage, capillary breaks, and vapor barriers as the core defenses against moisture migrating up through a slab. In practice, that translates to a few specific prep measures:
- Install a subslab vapor barrier before pouring new concrete, or add a vapor-retarding primer on existing slabs.
- Use self-leveling compound to correct dips and high spots that trap water under flooring.
- Add a dimpled subfloor membrane under LVP or engineered wood in rooms where extra moisture buffering is wanted.
- Fix exterior drainage and grading issues before finishing the interior, since outside water pressure drives much of what shows up inside.
Legacy example: the original article estimated these prep measures at $1 to $4 per square foot. Appropriate preparation can reduce the risk of flooring failure, but it does not guarantee performance.
Building-science literature and EPA guidance both note that invisible vapor drive, not just visible standing water, can contribute to below-grade flooring problems, which is why testing and prep need to happen even in basements that have never flooded. For homeowners dealing with ongoing dampness issues, our guide to diagnosing basement moisture problems (legacy resource; not yet migrated) walks through the site, foundation, and humidity factors in the order they should be addressed. Where radon mitigation systems are already in place or being installed, verifying subslab depressurization test results at the same time avoids disturbing the vapor barrier twice.
9. Costs, timelines, and what affects price
In the original article’s unverified example, a 600 square foot basement finished in rigid-core LVP runs roughly $2,400 to $6,000 in materials and labor before prep costs, while the same space in porcelain tile runs $4,200 to $10,800. Adding slab prep at $1 to $4 per square foot layers on another $600 to $2,400 depending on how much correction the slab needs. The original article also cited a legacy $50 to $140 per square foot range for full basement finishing; that figure is unverified and is not a Prestigious quote.
- Slab prep is the single biggest swing factor, since a slab that needs leveling or a vapor barrier adds real cost before flooring even starts.
- Radiant heat under tile adds both material and labor cost but changes how a tiled room feels day to day.
- Complex layouts with lots of cuts, transitions, or pattern work add labor hours regardless of material.
- Tile labor generally costs more per square foot than LVP labor due to the skill and time involved.
Materials may have a lead time of roughly one to three weeks in the original example depending on the product and supplier, while contractor scheduling can add several more weeks depending on local demand. LVP and carpet tiles are realistic DIY projects for a handy homeowner, but slab prep, tile setting, and radiant heat integration are worth leaving to a professional installer.
10. Maintenance, cleaning, and long-term care for basement floors
Hard surfaces like LVP, tile, and epoxy need only a damp mop with a mild detergent and regular dry sweeping to stay in good shape. Carpet tiles need routine vacuuming and the occasional spot clean with a carpet-safe cleaner.
After any spill or minor flood, the priority is speed. The EPA recommends drying wet materials within 24 to 48 hours to prevent mold growth, and that window applies directly to basement floors.
- Mop up standing water immediately and run a dehumidifier or fans to speed drying.
- Lift and inspect carpet tiles that were saturated, since porous materials can hold mold even after the surface looks dry.
- Replace any underlayment or pad that stayed wet for more than two days rather than trying to dry it in place.
11. How Prestigious Home Builders approaches basement flooring and finishing
Slab testing and vapor mitigation belong in the basement plan from the start rather than as an afterthought, so material choices can follow the actual slab conditions and manufacturer requirements.
Local permitting and code requirements vary by jurisdiction and are easy to miss when planning a finish on your own. For homeowners who want a clear budget picture before committing, our basement finishing services page and basement finishing ideas and budgets (legacy resource; not yet migrated) resource both lay out what a properly tested and prepped basement finish actually involves.
12. Summary recommendation and next steps
In summary: consider waterproof rigid-core LVP for most of your basement, then swap in porcelain tile or epoxy for laundry, walkout, and utility zones. Test the slab using the method your flooring manufacturer specifies, such as ASTM F2170, before buying anything, pick materials room by room, and get at least two contractor quotes. A dimpled membrane under living-area flooring adds upfront cost and may add warmth and vapor buffering where compatible with the flooring. Weigh that tradeoff against how long you plan to stay, since the cheaper option now is not always cheaper over ten years.
13. How Prestigious Home Builders can help finish your basement
The path from slab testing to finished floor involves decisions on which membrane or material fits a basement. A planning consultation can help clarify scope, budget assumptions and sequencing before signing any agreements.
- Coordinating slab preparation, vapor mitigation, and radiant-heat integration as one connected plan helps streamline the project.
- Managing flooring selection and installation alongside the rest of basement finishing, including framing, electrical, and egress, helps keep the work coordinated.
- Permit and code requirements vary by jurisdiction and scope; confirm them with the applicable local building authority.
Ready to see what your basement could look like? Visit the basement finishing page to start a consultation.
FAQ
What is the best overall basement flooring option?
Waterproof rigid-core luxury vinyl plank (LVP/SPC) is widely recommended as an all-around option for many finished basements, balancing moisture resistance, warmth and installed cost. Porcelain tile and epoxy coatings outperform it in moisture immunity but cost more and feel colder underfoot.
Is carpet or LVP better for a basement?
LVP generally outperforms carpet in a basement because its rigid core does not absorb water, while even carpet tiles with waterproof backing can trap moisture in a flood. Carpet tiles are still a reasonable choice for bedrooms and low-risk rooms where comfort matters more than worst-case flood resistance.
Do I need a vapor barrier under basement flooring?
Most basement flooring benefits from some form of vapor control, since moisture migrates up through concrete slabs even without visible flooding. A dimpled subfloor membrane or vapor-retarding underlayment is commonly used under some products; follow the flooring manufacturer’s instructions.
How do I test basement concrete for moisture before installing flooring?
A quick plastic-sheet test taped to the slab for 24 hours gives a rough read, but professional testing under ASTM F2170 using in-situ probes is a standard method many manufacturers specify; check the specific product’s warranty and installation terms. Skipping appropriate testing increases the risk of problems.
What basement flooring should I avoid?
Solid hardwood and laminate with a fiberboard core are generally considered a poor fit below grade, since vapor movement through the slab can cause cupping and swelling. Wood-look rigid-core LVP gives a similar appearance with far better moisture tolerance.