
Legacy planning examples, not current pricing or rules: Budget ranges, timelines, resale percentages and code references in this article are retained from the original publication as historical, third-party or illustrative examples. They are not Prestigious Home Builders pricing, quotes, current Utah averages or legal advice. Ceiling height, egress, bedroom eligibility, permits and moisture solutions depend on the specific property, proposed scope, jurisdiction and currently adopted code as administered by the local building authority.
The best way to plan a basement finish is to fix moisture and structural issues first, then handle permits and rough-ins, and save layout and finishes for last. Doing it in that order avoids ripping out drywall to fix a leak you should have caught in week one. Before you sketch a single layout, check these three things:
- Moisture test: A simple screening method is to tape plastic sheeting to the concrete floor and walls for 24 hours and check for condensation underneath. It is an indicator, not a diagnosis; persistent or unclear moisture warrants a professional assessment.
- Egress check: Before you plan any sleeping room or guest suite, ask your local building department which emergency escape and rescue opening requirements apply to your proposed scope.
- Rough-in planning: Mark where plumbing, electrical, and HVAC will need to run before you commit to a furniture layout.
Pro Tip: Moisture and egress are the two issues that get expensive fast if you skip them. Everything else is negotiable; these two are not.
Key Takeaways
A basement finish succeeds when moisture gets fixed first, permits and rough-ins happen before framing closes any walls, and flooring and material choices account for below-grade humidity.
| Point | Details |
|---|---|
| Sequence matters most | Inspect and waterproof before permits, rough-ins, framing, and finishes to avoid costly rework. |
| Egress drives layout | Confirm which escape and rescue opening requirements apply to any proposed sleeping room before you finalize the design. |
| Budget by scope | The original article cited third-party examples of under $10,000 for cosmetic updates, $10,000 to $40,000 for framed finishes and $40,000-plus for full suites. These are unverified legacy examples, not quotes. |
| Choose moisture-tolerant materials | LVP flooring and paperless drywall are commonly chosen below grade; suitability depends on the space’s moisture conditions and product specifications. |
| Hire pros for code-critical work | Structural, egress, plumbing, electrical and waterproofing work benefits from licensed trades and applicable permits. |
Basement Finishing Ideas by Room Use
Once the concrete floor is dry and the space is structurally sound, the fun part starts: deciding what the room actually becomes. Finished basements often land on a handful of common uses, each with its own typical footprint, budget tier and design shortcut. Whether a particular use suits your basement depends on ceiling height, light, access, moisture conditions, systems and applicable approvals. Trade sources tracking finished basement projects consistently point to the same short list of layouts homeowners gravitate toward.
- Home theater: Needs roughly 12×16 feet, blackout paint or dark walls, and dedicated circuits for AV gear. Budget: medium. Try acoustic wall panels and a coffered or beam-look ceiling.
- Wet bar or kitchenette: A 6 to 10 foot run works for most basements. Budget: medium to high, since plumbing drives the cost. Open shelving and a waterfall quartz counter read upscale without a full kitchen.
- Guest suite: Typically planned with an escape and rescue opening where required, a closet and ideally an adjoining bath; confirm sleeping-room requirements with your local building authority. Budget: high. Warm wood tones and layered lighting make it feel less like a basement, more like a boutique room.
- Home gym: A 10×12 foot zone with rubber flooring and a mirrored wall covers most home setups. Budget: low. Skip carpet here; moisture and sweat don’t mix well with fibers.
- Home office: A quiet 10×10 foot corner with good task lighting is often enough. Budget: low. A partition wall with glass panels keeps it open without losing privacy, an approach One Day Doors & Closets covers well for basements that need a defined workspace without boxing in the whole floor.
- Kids’ playroom: Open floor plans with durable, washable flooring work best. Budget: low. Bright accent walls and built-in cubbies age well as kids grow.
- Wine cellar: A small, insulated, temperature-controlled nook, often under 100 square feet. Budget: medium to high. Reclaimed wood racks and moody lighting sell the look.
- Multi-use game room: Combine a pool table, sectional, and a media wall in an open 20×20 foot layout. Budget: medium. A rustic or midcentury palette keeps a multi-purpose room from feeling cluttered.
Measuring and Planning a Basement Layout
Grab a tape measure before you grab a paint chip. Ceiling height matters most: codes commonly set a minimum finished ceiling height for habitable space, and mechanical ducts or beams can eat into that number fast, so measure the lowest point in the room, not the average. Stair headroom and window wells also carry requirements; confirm the applicable figures with your local building authority.
Egress is the single most code-sensitive item in a basement remodel. If you’re planning a bedroom or guest suite, ask your local building department which emergency escape and rescue opening requirements apply. The original article cited IBC Section 1208.2; that citation is unverified for residential basements, where the residential code adopted by your jurisdiction typically governs. A permit checklist should follow this order:
- Get a professional assessment of moisture, structure, and mechanical capacity.
- Obtain any required permits before framing or rough-in work begins.
- Schedule any required rough-in inspections before walls get closed up.
Measure fixed items early too. A pool table, a wet bar footprint, or a media wall all need exact dimensions on paper before framing starts, defining function before construction so the layout actually fits what you intend to put in the room.
Fixing Moisture and Structural Issues First
Run a simple moisture audit before you touch a stud. Look for efflorescence (white, chalky mineral deposits) on concrete walls, musty smells, and peeling paint. Tape a square of plastic to the floor for a day; moisture on the underside means the slab itself is wicking water, not just humid air. It’s also worth running a basic radon test before finishing; ask your local building authority whether any radon-related requirement applies to your project.
Common fixes, in rough order of priority:
- Correct exterior grading and gutter downspouts so water moves away from the foundation.
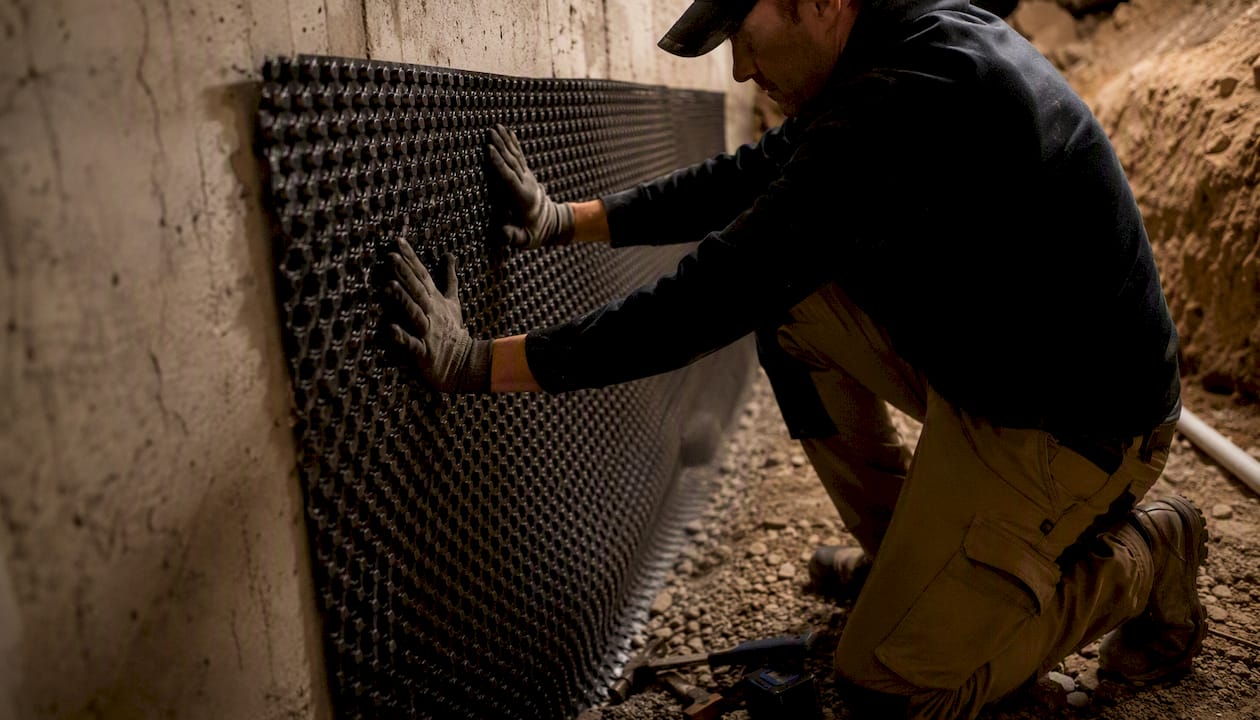
- Add an interior drain system and sump pump if water is entering through the slab.
- Consider crystalline sealers for porous concrete walls where a professional recommends them.
- Insulate with continuous rigid foam against the concrete plus batt insulation in stud cavities, a combination one third-party guide recommends for condensation control on below-grade walls. Insulation assemblies and required R-values depend on climate zone, adopted energy code and the wall’s moisture conditions.
Don’t install drywall or carpet until you’ve confirmed the space stays dry through at least one full rain cycle. A dehumidifier with a built-in humidity gauge, run continuously even after finishing, can help flag humidity problems early.
Pro Tip: Pay a professional for waterproofing and drainage systems. DIY the caulking and minor grading work yourself; drainage and waterproofing systems are not where you want a learning curve. No system eliminates every moisture risk, so ongoing monitoring still matters.
Planning Electrical, Plumbing, and HVAC Rough-Ins
Systems work is where a basement finish either goes smoothly or turns into a six-month headache. Plan for dedicated circuits and the AFCI or GFCI protection required by your adopted electrical code, particularly near a bar sink or bathroom, plumbing runs for any kitchenette or bath, and either an HVAC extension or a ductless mini-split if your existing system can’t reach the new square footage. Basements often benefit from mechanical ventilation, since they may lack the natural air exchange upper floors get from windows; an HVAC professional can assess capacity and ventilation needs.
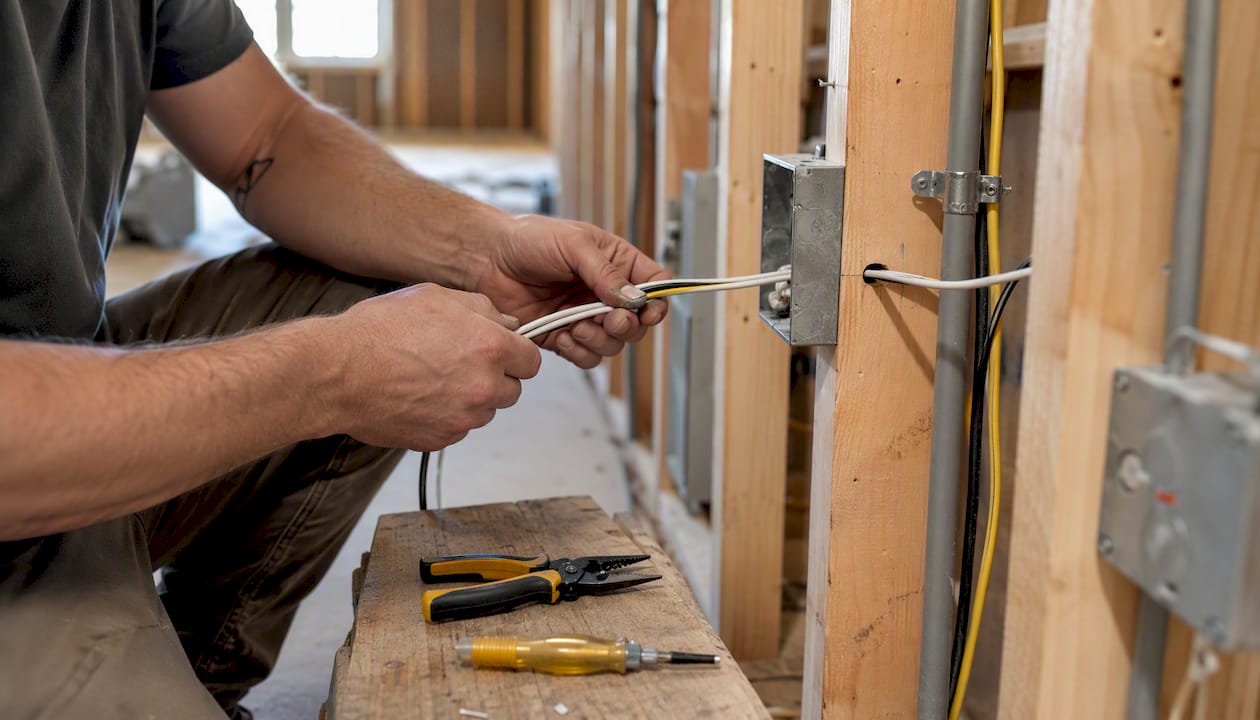
Utility chase walls should get planned around your finish layout, not the other way around. A wet bar or laundry nook needs its plumbing wall roughed in before framing locks the layout in place.
Before signing a contractor, ask:
- Who pulls the permits, you or them?
- What’s the expected inspection timeline for rough-ins?
- Do theater or gym spaces need dedicated circuits, and are those included in the bid?
Confirm this sequence with your contractor: rough-in placement, inspection, then framing closes the walls.
Choosing Flooring, Ceilings, Walls, and Lighting
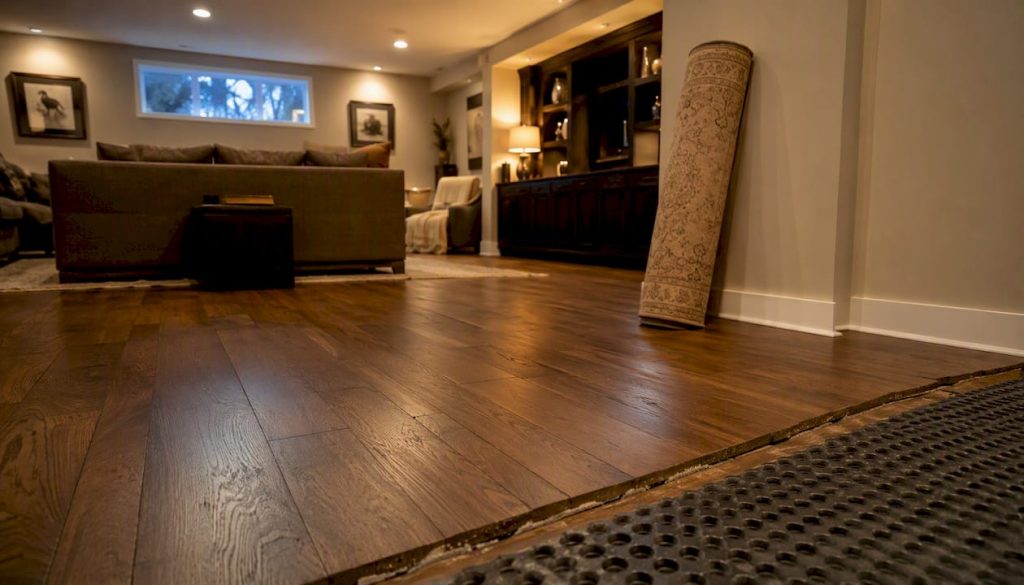
Flooring choice in a basement is really a moisture-management decision disguised as a style decision. Luxury vinyl plank over a dimpled underlayment is a frequently recommended option because many products are water-resistant and, depending on the product and installation, planks can sometimes be pulled up, dried and reinstalled after minor water exposure. Confirm the manufacturer’s below-grade and moisture ratings. Carpet tile works for playrooms where softness matters more than flood resilience, and polished concrete or engineered wood can work in drier climates with a proven track record.
Low ceilings are a basement’s most common design constraint. Painting exposed joists black or dark gray reads intentional rather than unfinished, thin recessed LED wafer lights add almost no depth loss, and drop ceilings with high-humidity-rated panels still make sense where you need easy access to plumbing or ductwork. Any ceiling approach must still satisfy applicable minimum height requirements.
For walls, paperless drywall is generally more mold-resistant than standard paper-faced panels in a below-grade environment, and leaving a small gap at the floor line protects against minor moisture wicking. Paneling or paintable concrete work as budget alternatives.
Layer your lighting: ambient recessed LED wafers for general coverage, task pendants over a bar or desk, and accent lighting along one wall to trick the eye into perceiving more height. Built-in shelving and under-stair storage add function without locking you into a theme you might regret in five years.
Pro Tip: Skip full carpet in a basement unless the room stays consistently dry year-round. Even a small unnoticed leak under carpet pad can grow mold before you smell it.
Basement Remodel Budget and Timeline Expectations
Cost scales with scope. As unverified legacy examples, the original article cited surface-level updates on an already-dry basement at under $10,000, a framed, drywalled basic finish in a third-party $10,000 to $40,000 range, and a full suite with a bathroom or sleeping room above $40,000 once plumbing, egress work and permits are included. These are not Prestigious pricing, quotes or current Utah averages.
The build order that keeps a project on schedule and avoids rework looks like this:
- Inspect for moisture, structure, and mechanical capacity.
- Waterproof and address drainage.
- Complete rough-ins for plumbing, electrical, and HVAC.
- Frame walls and install insulation.
- Hang and finish drywall.
- Install flooring, trim, lighting, and final finishes.
As legacy illustrative timelines, a small cosmetic refresh might take two to three weeks, a mid-range framed basement with a bathroom eight to twelve weeks, and a full suite or ADU-style conversion four months or more. Actual schedules depend on scope, selections, trade availability and review times, particularly if egress window cutting or structural work requires additional permitting cycles.
The original article stated that a permitted, well-sequenced finish typically returns 65 to 80 percent of its cost at resale. That figure was unsourced and is not predictive for any property; resale effect depends on the local market and comparable sales. Proper permits and inspections still matter because undocumented work can complicate future sales and insurance questions.
DIY vs. Hiring a Licensed Pro
Some basement tasks are genuinely beginner-friendly. Painting, installing LVP over a properly prepared subfloor, trim carpentry, and basic shelving are all reasonable weekend projects. A hybrid approach, hiring pros for the code-critical work and handling cosmetic finishes yourself, can reduce total project cost; the original article’s 30 to 40 percent savings estimate was unsourced and is not verified.
Leave these to licensed trades: structural framing changes, egress window cutting, major plumbing or electrical work, and waterproofing systems. Before hiring anyone, ask about their license number, who handles permit filing, and what warranty or insurance covers their work if something fails after the walls close.
How a Professional Approaches a Basement Finish
A professional basement finish typically follows the same order of operations this article recommends: site assessment first, then moisture and drainage corrections, then any required permits and rough-ins, then finish selections confirmed before drywall closes anything up. Settling selections early reduces the chance of mid-project change orders.
A basement that’s assessed, waterproofed, and permitted in the right order helps protect the homeowner’s budget, since a rushed or skipped step can resurface later as a repair bill or a question during a sale or appraisal.
The same sequencing applies to broader full home remodeling and interior remodeling work, where a poorly planned lower level can undercut the space it was meant to add.
Common Challenges in Basement Finishing
Low ceiling height trips up more basement projects than any other single issue. If ductwork or beams eat into your headroom, options include relocating ducts, using a bulkhead that hides mechanicals in one area instead of across the whole ceiling, or choosing thin flooring and low-profile lighting to reclaim inches.
Uneven or sloped concrete floors are another frequent surprise. A self-leveling compound can correct minor slope before flooring goes down, but severe grade issues sometimes mean the drainage plan needs rethinking entirely rather than just floor prep.
Limited natural light makes a basement feel like a basement no matter how nice the finishes are. Layered lighting helps, but so does choosing lighter wall colors and, where structurally possible, adding or enlarging a window well. That same window work may also help address escape and rescue opening requirements for a sleeping room, where the design and local authority confirm it.
Odor and humidity control is an ongoing challenge, not a one-time fix. A dehumidifier running year-round, paired with a bathroom or kitchenette exhaust fan vented to the exterior, can help reduce the musty smell that makes finished basements feel unfinished.
Finally, unexpected utility relocations catch homeowners off guard mid-project. A sewer line or electrical panel sitting exactly where you wanted a closet is common enough that it’s worth having a contractor walk the space and flag conflicts before you finalize a layout on paper.
What Remodelers Wish Homeowners Knew
The detail that causes the most rework isn’t a design choice. It’s skipping the extended moisture test before finishes go in. Run your test for a full week, through at least one rain, before you commit to a layout.
Get a Basement Finishing Estimate
Prestigious Home Builders provides basement finishing in Washington and Iron Counties, Utah. A consultation is a chance to review your space, goals, existing conditions and the questions that will shape a project-specific scope, budget and schedule.
If you’ve been weighing whether to tackle this yourself or bring in a licensed team, the calculation usually comes down to how much time you want to spend managing permits, inspections and subcontractor schedules. You can review completed work in our portfolio, and when you’re ready, request a quote for your basement.
Frequently Asked Questions About Basement Finishing Ideas
What’s the best basement finishing idea for a small basement?
A multi-use layout, like a home office paired with a small gym zone, gets the most function out of limited square footage without requiring a full kitchenette or bathroom.
How much does it cost to finish a basement in 2026?
The original article cited legacy third-party examples from under $10,000 for cosmetic updates to over $40,000 for a full suite with a bathroom. These are not quotes or current Utah averages; cost depends on scope, existing conditions and whether plumbing or egress work is involved.
Do I need a permit to finish my basement?
Often, particularly for electrical, plumbing, structural work and new sleeping rooms, but requirements depend on your jurisdiction and scope. Check with your local building department before starting framing. See do you need a permit to remodel a basement.
What flooring works best in a basement?
Luxury vinyl plank over a dimpled underlayment is a common choice because many products resist moisture; confirm the product’s below-grade rating.
How long does a basement remodel take?
As legacy illustrative ranges, a small cosmetic refresh might take two to three weeks, a mid-range finish with a bathroom eight to twelve weeks, and a full suite four months or longer. Your schedule depends on scope and approvals.
Sources
- Third-party sources cited by the original article:
- How to Finish a Basement: The Complete 2026 Guide
- 16 Basement Remodel Ideas That Match Your Space and Budget